Showing posts with label Friendsgiving Ideas. Show all posts

Tuesday, October 18, 2016

FRIENDSGIVING INVITATION | 2016

Lord willing, we will be marking off an item off of our Fall Bucket list a month from tomorrow! We are planning on hosting our 2nd annual Friendsgiving, and our first Friendsgiving in our new home. We are so excited and have been looking forward to this event since last Friendsgiving
Our best friends, good food, football, cooler weather, and games...it's our favorite event to host and we are counting down the days!

Here is our 2015 Friendsgiving invitation and below is the invitation that I designed for this year!


We plan on doing Friendsgiving potluck style again this year. It worked really well last year and we're sticking with it this year. Last year the weather was really chilly and I think it rained off and on throughout the day, so we're hoping for cool but sunny weather this year!

Tuesday, November 17, 2015

PUMPKIN CANDLE CENTERPIECES

One of my favorite parts about hosting special events is planning and decorating for the event. I'll spend quite a bit of time on Pinterest and blogs looking for ideas and then go from there. I shared yesterday about our Friendsgiving and today I am going to share about the centerpieces I made for it!


What you will need:

- Medium pumpkin
- Knife
- Pencil or Pen
- Pillar Candle
- Trash Bag
- Hot Glue Gun
- Artificial twigs, berries, and leaves (I found mine at Hobby Lobby for 50% off!)

Step 1 | You'll need to snap the stem off before you begin. It usually snaps off pretty easily and leaves a clean area to work with.

Step 2 | Using a pencil or pen trace your candle. Make sure it's in the middle of your pumpkin.

Step 3 | After you traced your candle in desired area you can begin cutting the hole out for your candle to fit!

Step 4 | Remove the pumpkin guts, as I like to call it. Make sure to get as much out as you can so your candle has room to fit.

Step 5 | Place your candles inside of the pumpkin at desired height. I recommend keeping them up pretty high so when you light them later it won't be too close to artificial leaves/floral stems and catch on fire. Learn from my mistake ;)

Step 6 | Start hot gluing artificial twigs, leaves, and berries all around the top. If there is room you can stick some in between the candle and pumpkin and it will hold it's place well.

Step 7 | Put it in the middle of your table for everyone to see!

Monday, November 16, 2015

FRIENDSGIVING 2015

Friendsgiving was a huge success and we are already excited about hosting again next year! I took a lot of pictures so get ready for a photo dump.


First some pictures of our Friendsgiving day with everyone!

My sister got there early to help with anything and I was so thankful she was there!

This sweet man also helped with anything I needed. He kept coming in the kitchen to check and see if he needed to do anything. So sweet! :) 

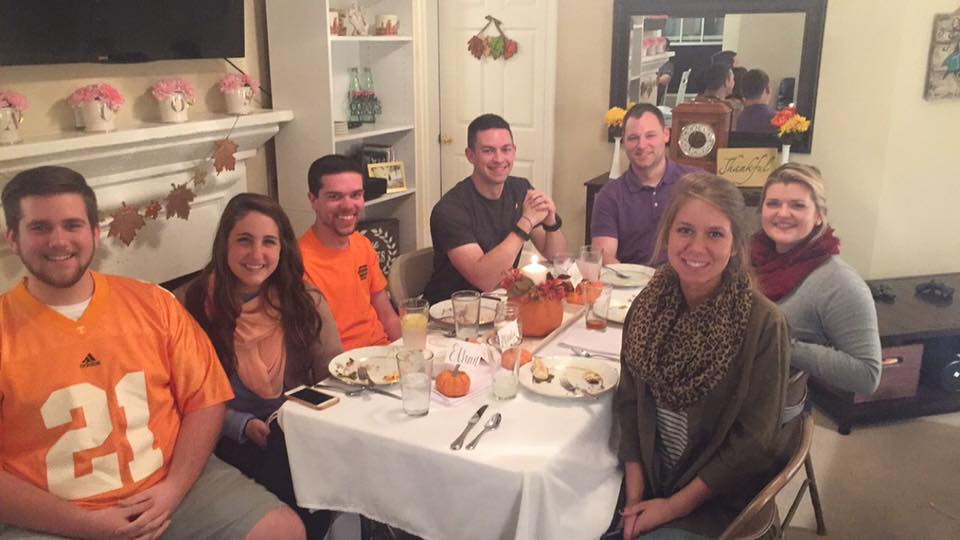
We finally got a good group picture! It took a few tries as the guys kept being goofy lol but it made for some hilarious pictures. Also, the two in orange didn't just break out of prison, they were decked out for the UT game lol.


I saw a couple of Friendsgiving snaps and got really excited!


And now pictures of the table setup! I searched Pinterest for a few weeks on what I wanted to do. I wanted to stay within budget, but still come up with something cute. I used a lot of stuff I already had and spent very little on the things I needed to pick up for the centerpieces/place card settings. 


I dug out some plates I had collected for our wedding and used. I think I have decided on keeping these for special occasions because I just love them so much. The gold detailing on them make me so happy!

And that's about it! I'll share how I made the centerpieces/place card settings tomorrow.