Showing posts with label Tips & Tricks. Show all posts

Thursday, September 6, 2018

NATURAL HEARTBURN REMEDY


A couple of years ago my uncle told us that he drinks a small cup of water with a teaspoon of apple cider vinegar mixed in it everyday and that completely stopped his heartburn. Matthew was having heartburn every now and then at the time, so we tried it to avoid taking over the counter medicine, and it worked!

We know for sure it works because whenever he goes too long without some good ol ACV his heartburn will return. Understandably, Matthew HATES it, but still does it to avoid heartburn and medicine. We have used honey and lemon juice to try and dull the unpleasant taste of ACV, but we have gotten to where we just do a teaspoon of ACV and water every morning. If I am feeling sick or I have a cough, then I will add honey and lemon juice. 

There are so many benefits to drinking a small amount of apple cider vinegar each day, you can read some of those here

Can you get past the bitter taste of ACV??


Friday, August 31, 2018

TRAVELING WITH A DOG | PACKING LIST


We don't live in the same town as any of our family, however, we are really lucky and live about 45 minutes from both of our parent's house. We go back "home" for the day or the whole weekend quite often to visit family and friends and having a bag packed and ready for Reagan helps us out so much...of course we take her with us!
 I'll share what we keep in this bag at all times, what we add to it right before we walk out the door, and other travel necessities for our fluffy girl.

I like to keep things in her bag at all times so I'm not running around trying to pack a travel bag for her and ourselves. 


| IN THE BAG AT ALL TIMES |
Having a dispenser with a leash clip comes in handy when you travel. I usually just make sure the dispenser has enough waste bags in it to get us through our trip and that's all I bring. If you wanted to be extra cautious, throw a new roll of waste bags in your bag.

- Ziplock bag with treats
Reagan is a fan or her treats and most definitely expects one when she comes back inside from using the bathroom. 

We keep a cheap, small water and food bowl in her travel bag at all times. That way we don't have to remember to pack her set from the house. 

- Extra collar and leash
Normally we use a harness on Reagan, but I like to keep an extra leash and collar in her bag, just in case one were to break while we were traveling. 

- Baby Wipes
Baby wipes for muddy paws, to wipe her mouth if she were to get sick, etc.

- Toys
I like to keep 2-3 of Reagan's toys in her bag so that when we go somewhere she has them. If we go to someone's house for the weekend and leave her in her travel crate while we go to dinner or out for an event, I like to put a toy that she is familiar with in her travel crate with her.

- Small Blanket
I keep a small blanket in her bag for the same reason as the toys. She lays on it in her travel crate and it's something she is familiar with. I have found these for around $5 or less at Wal-Mart

- Medication
If we are going on a long car trip, then I pack Reagan's car sickness medicine. If your dog has to take medicine, put enough for your trip in a ziplock bag and throw in your travel bag. 


| WHAT WE ADD RIGHT BEFORE WE LEAVE |
I absolutely LOVE these containers and they are under $5! We keep dog food in this while we travel. It has never spilled and has always worked so well for us. Reagan doesn't not eat a lot, so as long as it's half way full, it will last us a weekend or for a long weekend trip. 

- Harness and retractable leash


| OTHER TRAVEL NECESSITIES |
This crate is very similar to the one we have. It it very easy to put together and take down. It packs pretty flat, so I usually just keep it in the trunk of my car for when needed. Reagan is 8lbs, but we made sure to get the larger size travel crate so that she would have plenty of room to stretch out. 

We got this for longer trips or for when I am driving solo. Reagan isn't a huge fan of it, as she would rather just sit in my lap (#spoiled), but it works well for when we need it. We especially like this one because it's tall enough where she can see out the window in the backseat while buckled in to it. Shout-out to my MIL for the recommendation on this one and the travel crate! 


Thursday, February 2, 2017

10 THINGS TO DO AT THE BEGINNING OF EVERY MONTH


Everyone loves a fresh start, a new year/month, a new planner/calendar, new ideas, and maybe even a new budget....I know I'm not the only one out there that loves all that! I like to think that I get 12 fresh starts a year (obviously, I could look at Mondays as a fresh start, and sometimes I do, and then I would have 52 fresh starts this year.)


- Deep clean your home
There are so many different ways to deep clean your home, but do what works best for you. There is nothing better than starting a new month with clean home and clean slate! While you're at it, deep clean your car. Throw out all the trash and wipe everything down. Don't forget about your trunk!


- Goals
Take some time to think about your 2017 goals at the beginning of each month, what all do you want to accomplish this year? What small goals can you do each month to reach your bigger goals? You have 365 days, so challenge yourself a little each month, but don't forget to take some time to rest and recharge. Once your have made out your goals print them out and tape up where you'll see them everyday for that month. Maybe on your bathroom mirror, the refrigerator, or what I like to do, tape them in my planner. I like to make out personal goals and then my husband and I like to make out goals for the both of us together. 


- Discuss finances & budget
Sit down and make a budget, or if you're married, sit down and make a budget out with your husband. Do it together so that you can both have some input in it and there are no surprises later on in the month that one of you didn't know about.


- Upload pictures and delete them off your phone
We all hate that little message that pops up on our phone telling us "out of storage" of when you go to take a picture but can't because you don't have enough storage. Now's the time to upload/download/delete them!


- Schedule any appointments/meetings
Get your planner out and write down any meetings/appointments that you know of right then that are coming up that month, or if you need to schedule any with someone then do that!


- Buy birthday/thank you cards
I hate when a birthday sneaks up on me and I keep forgetting to pick up a birthday card at the store, or if I need a 'thank you' card. You can buy them in bulk herehere, or you could always go to Dollar Tree and buy a bunch to keep on hand! Keep them organized and whenever a birthday comes up just pull it our and personalize it with a heartfelt message 


- Plan any trips/schedule travel plans
If you are planning on taking any day trips, weekend trips or long weekend trips then go on and plan add that to your planner! If you need to put in a PTO request at work, do that as well. If you are planning on taking a longer trip within the next couple of months then plan something small this month to get you prepared for that trip (buy travel size toiletries, book your flights, nail down part of your itinerary, etc.) 


- Donate
Walk around your house at the beginning of every month with a trash bag/laundry basket and commit to donating at least two items per month. It doesn't have to be something big, an old pair of jeans will do. If you keep with the two items per month then by December you will have donated at least 24 items! That's 24 items that were just laying around your house causing a cluttered mess that someone else could be using. What's that saying....one man's junk is another man's treasure ;)


- Clean out your refrigerator and pantry
Check for any expired items and dispose of them! While you're in there take inventory of any staple items that your keep in your refrigerator/pantry and add them to your grocery list if you see that you are getting low or out.


- Clean out your purse
You've already deep cleaned, cleaned out your car, refrigerator and pantry so you might as well go on and clean out your purse, too! Throw away or store any receipts that you've been holding on to. Any extra papers floating around in your purse? Throw them away! I always seem to collect our church bulletin in my purse, so by the end of the month I have 4+ floating around in there.

I truly believe that doing most of these things will help you stay organized all month and year! Is there anything that you like doing at the beginning of every month?

Tuesday, January 24, 2017

DIY HOUSEWARMING GIFT

Back in October my best friend and her husband bought their first house together. I was beyond thrilled for them because I how exciting that is! I wanted to do something special for them and searched high and low on Pinterest for a housewarming gift. Do I get them a frame or a cute decor piece? Or do I get them a nice candle or order something personalized on Etsy? None of those sparked any interest with me so I ultimately decided to make them a housewarming basket with a few small things for their first couple of days in their new home!


I bought a 5 gallon Home Depot bucket and then started looking for things to fill it! I thought back to when we moved in our new home, what did we need? Most of our belongings were still packed away and we were working during the day and coming home every night and unpacking all while trying to cook, do laundry and clean. That's a lot to handle at one time, so I wanted to fill it with things that would help. So here is what we got to fill their bucket with:

- Water bottles
- Grocery sacks
- Clorox wipes
- Mr. Clean magic erasers
- Paper towels
- Plastic cups
- Paper plates
- Plastic cutlery
- Wooden stirrers (for when they painted)
- Candle


I put water bottles in the bottom of the bucket and then loaded the bucket with tons of left over grocery sacks. They can have the water bottles for on the go and they can use the grocery sacks as a small trash bag for a few small things, when needed. This also helped fill the bucket since it's so deep. We chose the Home Depot bucket so that they can reuse it again for any outside/garage needs in the future. All of the items in the bucket are items we used the first couple of weeks after we moved into our house. So I hoped that they would be items that they could use to help lighten the craziness of moving/unpacking! Of course, everyone needs a candle and I knew her favorite was vanilla, so that was a fun treat to add in there. Candles always make a house feel homey.

Tuesday, January 17, 2017

HOW TO ORGANIZE A BIG MESS...START TO FINISH

This past Saturday I spent a few hours cleaning out our kitchen pantry and the cabinet above our stove, that also holds pantry items.

I had the house to myself and no plans so I took my time, listened to a few podcast episodes, sanitized everything, threw a lot of stuff away, and organized everything. IT FELT GREAT.


Since we didn't have any plans I was able to take my time, even leaving to run to the store to pick up a few baskets, and organize everything to work just for us. Now if I didn't have enough time I probably wouldn't have even started that project, because I hate being rushed when cleaning/organizing. If I'm rushed when it comes to organizing then it's just not going to get done the way I want it to be and will quickly turn into a mess again very soon after I finish, but with having time to take everything out, look at what works for us and what didn't (hello crazy big mess) I am able to change things up a bit. Below I'll share the steps to organizing a big mess using our pantry as an example since that's the big mess I tackled this past weekend.

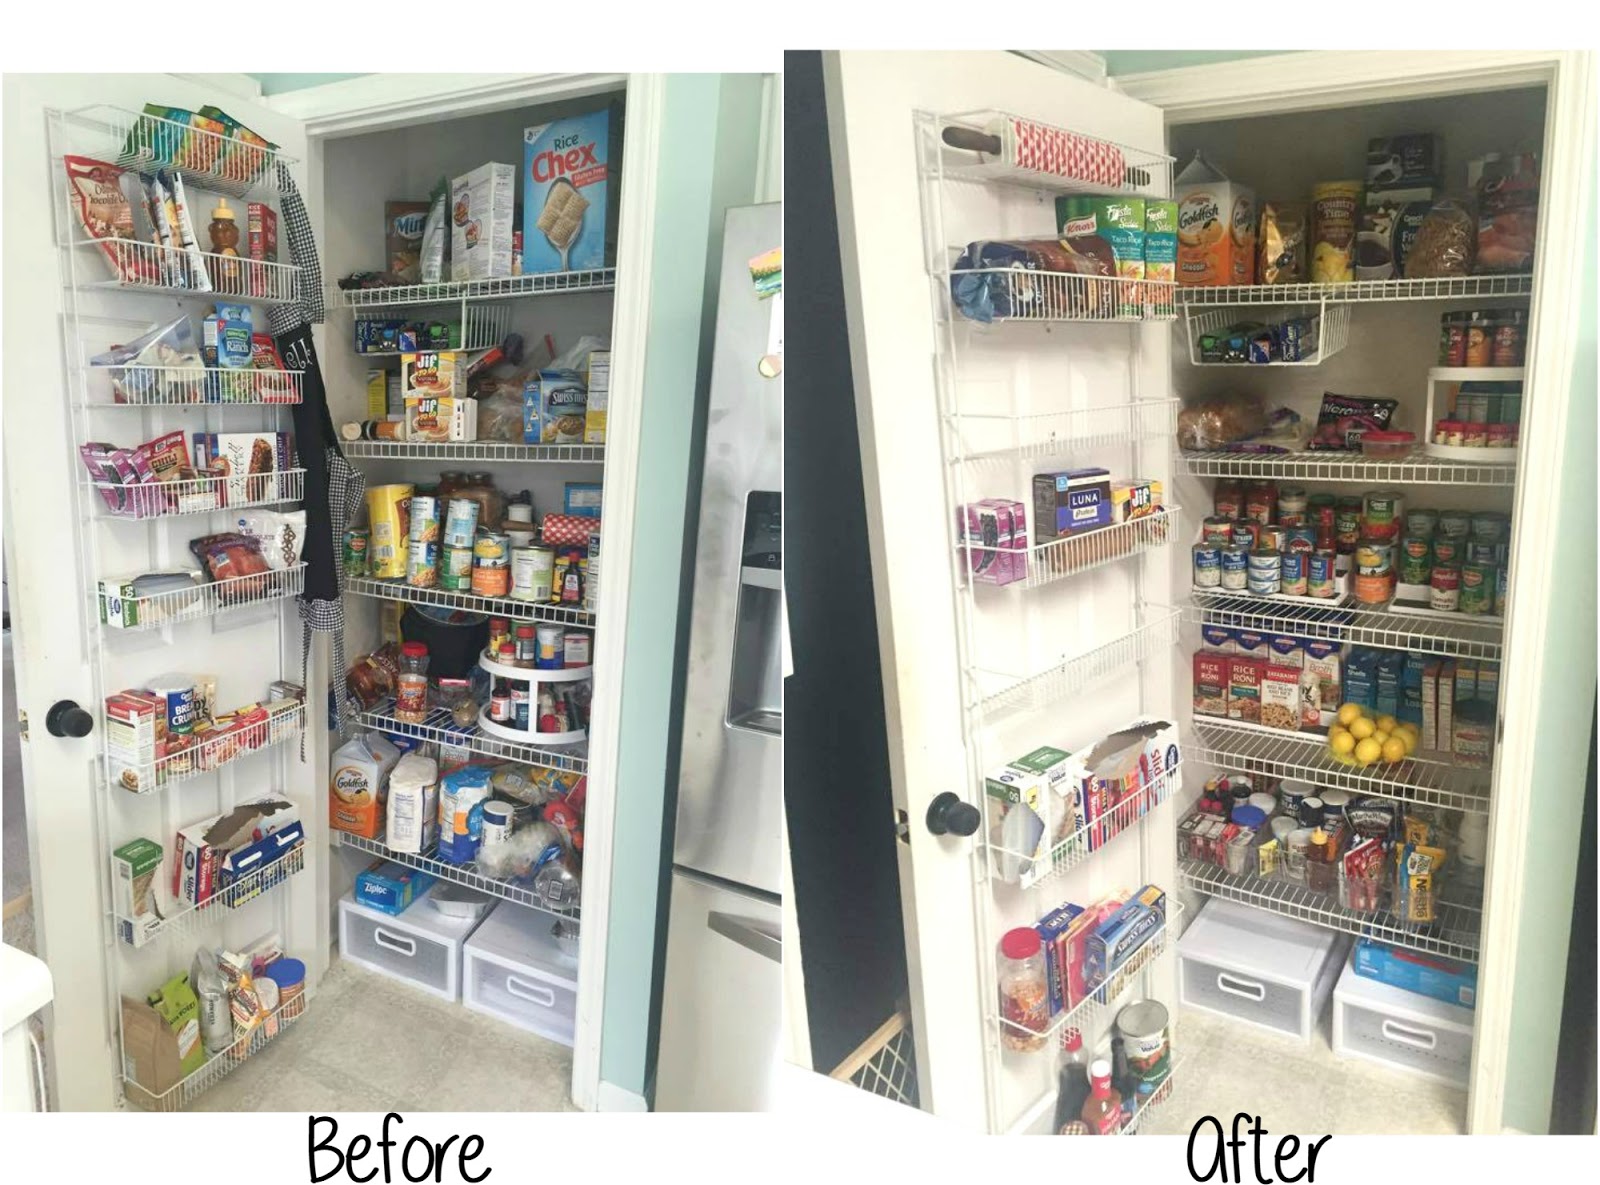
Since I love seeing before and after pictures let's start with that
If you look at the 'before' picture then you will see a hot mess. Cans literally about to fall off the shelf, the shelves on the door are overflowing, things are everywhere and have no order whatsoever. If you look at the 'after' picture then you will see an organized pantry! Things are in their place, there are TWO empty shelves on the door, and I don't have to worry about anything falling out when I open the door. 

Step ONE |
The first thing I did was find a podcast I wanted to listen to and then I began pulling everything out of our pantry. I laid everything out on our counters so that once I was finished I could go through and decide on what I wanted to keep and what I wanted to dispose of. 

Step TWO |
We have a few of the 3-tier cabinet organizers and this 2- tier cabinet lazy susan in our pantry and they are a life saver for us!! I love them and use them all the time. After I emptied the pantry I took all of the organizers that I have and let them soak in hot soapy water while I went through everything else, and then washed them really well before putting them back in the pantry.
I also wiped down all the shelves in the pantry and then vacuumed the pantry floor.

Step THREE |
After that was done I went through everything on the counters. Some stuff was outdated, some stuff we didn't need anymore, some boxes had one thing left in it, and some things I have no idea how it ended up in our pantry.

Step FOUR |
Once that part was finished, I started putting things back in the pantry, but this time everything had a certain spot. I put the things we use daily at eye level an the things we don't use often on the very top shelf. This also helps when it comes tome to make my grocery list. If I can't see something in our pantry when I open the door then I sometimes assume we are out of it and will order more of it. Which in the long run wastes money and causes clutter in our pantry. 
 Two EMPTY shelves after I was finished...woo hoo! I plan on finding a small container to put on one of those shelves that will hold snacks, that we can just easily grab out of there on our way out the door.

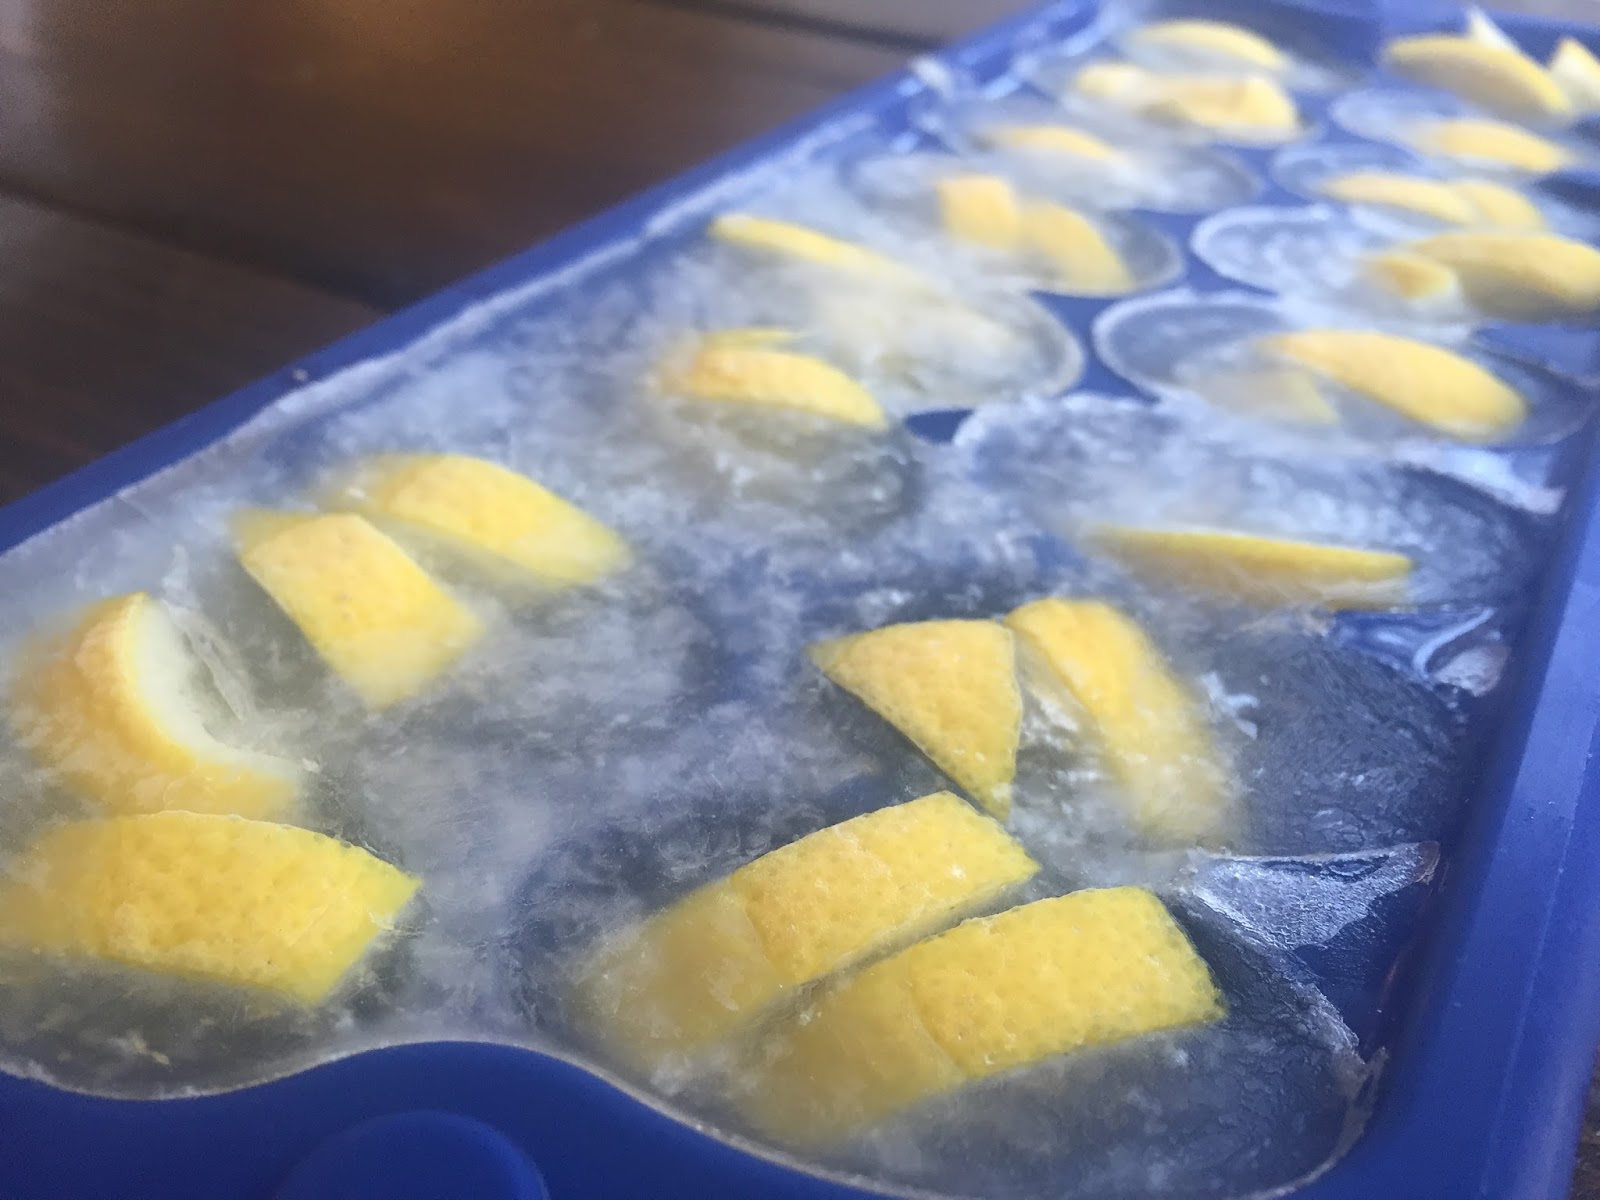
The fourth shelf houses all of our pasta/rice items and chicken/beef broth (I buy it in bulk when it goes on sale!) I need a basket for my lemons!
 On the bottom shelf I used containers similar to these (I found them at Home Goods for around $5 a piece) and placed certain items in them. Most of the bottom shelf/containers hold all of our baking items. I love those clear containers, they are the perfect size and since they are clear I can see everything in them.

The third shelf houses all of our canned goods. I have two of the 3-tier organizers on this shelf. I can see at all times what canned goods we have, makes it SO much easier when making out my grocery list!

On the second shelf is our bread/tortillas and our pantry lazy susan. Again, this thing is a life saver and I use it whenever I cook. I love being able to see every spice/seasoning mix that I have by just turning this thing. Behind it is our extra flour and sugar. I like to keep those things in a clear container above the stove, so I store the extra behind the pantry lazy susan since I don't use them daily.

Step FIVE |
After everything is back in the pantry and organized you'll probably need to wipe down your counters and vacuum your kitchen. I didn't realize stuff dropped out of certain boxes when moving everything back and forth and had sugar, flour, etc. on the counters and floor. Also, you'll probably need to empty your trash after! We had a ton of boxes and out dated items in ours.

Wednesday, January 11, 2017

TAKE THEM A MEAL

I love cooking for others, for a dinner at our home, and I love cooking for others, for a dinner in their home. Have you ever had the opportunity to take family or friends dinner? Maybe they are going through a tough time, they are new parents, or new neighbors just moved in next door, etc. Whatever the reason is, there is always something going on in life that requires a meal, and a good one at that!

One of my favorite things to make for these kinds of situations is lasagna. Maybe not everyone likes lasagna as much as we do, but I like to assume they do. 

Lasagna, the easiest meal to make, and it freezes well! The two families that I made dinner for recently were small, so if you are making dinner for a larger family then I would recommend making larger portions. I bought these, aluminum to-go containers at Dollar Tree and they come in packs of three.

You know what's even better than lasagna? Lasagna that you didn't even have to cook yourself and is delivered right to your doorstep...I like to make each family two lasagnas (one to eat that night and one to freeze for another time, they are good for up to 6 months) a box of garlic bread, salad + dressing, dessert, and if I have extra time I will make them breakfast! Breakfast casserole, breakfast burritos, or what I did recently, cinnamon rolls - all in disposable containers to keep it hassle free! 

 I also made recipe cards to label each item. That way if they have any questions about what's in the dish or need instructions to warm it they have it right there in front of them! Check out the recipe card printable below. I printed a lot off and keep them in my kitchen for anytime I need them!

You can find the Pioneer Woman's recipes here, and I will be sharing the lasagna recipe tomorrow!


Here is the recipe card that I designed for these and for future meals. You can right click and save on the picture below to save it to your computer for your own personal use.


Thursday, January 7, 2016

GARBAGE DISPOSAL BOMBS

I am just full of stuff to share with y'all this week (read: I'm trying to clear my camera roll on my phone!) I have had these pictures on my phone for a few weeks and have been meaning on sharing this with y'all. 

I didn't grow up with a garbage disposal and my college apartment didn't have one so when I moved into our apartment after we got married I realized we had one and was super pumped. I probably use it everyday to every other day. I throw just about all of our scraps in there and then turn it on and just go on. Well soon after I realized it was leaving a bad odor. My MIL recommended throwing some sliced up lemons down there and that ice sharpens the blades. So I immediately thought of making making ice cubes with lemons in them...garbage disposal bombs! The lemons and vinegar are great cleaning products and the ice sharpens your garbage disposal blades. 

Here is what you'll need:
- 1-2 lemons
- Vinegar
- Ice tray (these were 2 for $1 at Wal-Mart!)
- Water


I fill each space half way with vinegar and then I usually add 3-4 pieces of lemon into the water. Once the lemons are in place I fill the rest of the way with water.


I put them in the freezer and leave them over night. 

The next day I'll take them out and put in a large freezer zip lock bag. I put them in a zip lock bag to avoid my whole freezer smelling like vinegar :)

and here is a closer look at them!

They are really easy to make and most of the stuff you already have on hand! I usually use 2-3 at a time depending on what just went into the garbage disposal. I always make sure I have these on hand when we are having a dinner party and I know there will be a lot of stuff to throw away after. Like back at Friendsgiving, after I cleaned up the kitchen and the dishes were put away I just threw 3 of these into the garbage disposal and turned it on. It left a nice lemon aroma in our kitchen and I didn't have to worry about any leftover foods stinking the place up! 

A few things:
- Instead of lemons you could also try oranges or limes. 
- I only use those ice trays for these.
- If the vinegar smell is too much for you, then you could just use water. 

Wednesday, November 18, 2015

HOW TO SERVE ICE CREAM

My MIL is the queen of the kitchen. Give her random ingredients and she can make a delicious meal that will leave your mouth watering for more. Our rehearsal dinner was incredible and our friends and family are still talking about it, and I don't blame them. It was just that good!

For my BIL's rehearsal dinner they decided to serve blackberry/blueberry cobbler (insanely good) with ice cream for dessert. My MIL wanted to be able to keep the ice cream cold while it was served buffet style. So she came up with this genius idea, and I was SO impressed with how well it worked!


YES that is ice! 

Here is what she did...put water in the first bowl > ice cream in the second bowl > put the second bowl in the first bowl > put it in the freezer.


Seriously, why didn't I think of this years ago! Especially when we celebrated Matthew's undergrad graduation with an ice cream bar?!?!


Here's the "ice bowl" from the first bowl after the dinner was over and we were cleaning up. Still completely solid.


Making a delicious apple pie this Thanksgiving? Serve some ice cream with it, and give this trick a try to keep the ice cream from melting!